How to assemble an FPV drone if you are not a professional
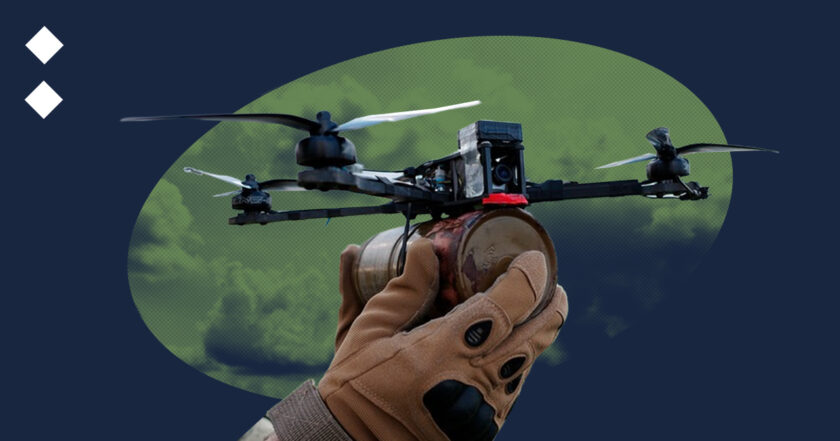
Only a very lazy person has not heard about the importance of FPV drones — the Ukrainian military and volunteers are shouting, and officials are admitting.
Their advantage is cheapness and ease of manufacture, which partially compensate for the lack of more expensive weapons. In the face of reduced assistance from partners, the availability of FPV drones in many ways becomes a matter of survival.
This post grew out of a post where I showed off my first assembled drone and shared my experience of learning how to make drones if you're the ultimate soft scientist and have never done anything technical.
Then, many people contacted me with questions, so I decided to develop this topic and collect all the information into a more extensive article. I don't pretend to be an expert, and this article only reflects the subjective way of learning and is intended to save the time of people who are starting to be interested in the topic. Probably, for people with a technical education, this text will not reveal anything new.
There are three possible ways to learn how to assemble drones:
- Learn by yourself from videos on the Internet.
- Take a comprehensive online course.
- Go to offline training.
I have tried all options. These were videos from the eDrone and SocailDroneUA channels, the People's FPV online course from Victory Drones, and the FPV Engineer training course from the Dzhmil company.
In general, if you, like me, are a soft scientist who is far from everything technical, then I would not advise you to try to assemble drones yourself. It may look very easy in the video, but there are many nuances, and without knowing which, you can simply spoil the product or, even worse, make a drone that will fall on your head.
At the same time, the offline training market for FPV assembly is still quite small, and the courses on it are not suitable for everyone. Therefore, I would advise combining approaches.
I would first recommend watching this video on what makes an FPV drone on the e-Drone channel.
On the same channel, there is generally all information about the assembly of drones, but some points are significantly different from what is taught in special training.
The average cost of a drone kit is $250-300, and a finished drone costs $400-500.
The process of creating a drone can be divided into four stages:
- Selection of equipment.
- Assembly.
- Programming.
- Flight tests.
Step 1. Complete set and details
The first problem begins at the stage of selection of equipment.
99% of everything that makes up the drone comes from China. China has officially imposed an embargo on the supply of parts for drones to both Ukraine and Russia. But both countries bypass these requirements, and unfortunately, it is much easier for the Russians to do so. The Russians bought out all orders from some Chinese manufacturers for a couple of years ahead.
And yet, equipment comes to Ukraine from China relatively stably — through intermediaries from third countries. And here, it is necessary to understand that Chinese goods are not IKEA — there is a constant shortage and the wrong spare parts. Some problems can be checked when receiving the goods, and some become visible only when the drone is assembled.
Getting quality parts is somewhat of a challenge that is hard to overcome on your own. Therefore, it is better to cooperate with organizations that purchase large batches of parts and check them for defects and adequacy.
While learning about our configuration, we received six modifications of spare parts from the instructors. They are small but significantly affect the result, and it is almost impossible for a layperson to understand which modifications are needed.
For reference: Ukrainians are gradually setting up their own parts production for drones. But I would not advise beginners to take them because often they are rather prototypes that experts have to deal with. However, in the next six months to a year, there is a possibility that many parts will be mass-produced in Ukraine.
The second part of working with the kit is developing an assembly scheme.
One FPV drone can fly 5 km with the same equipment, and another — 15. In addition to the pilot's experience, how the parts were connected has a great influence.
And here, disputes begin even among professionals. Someone attaches the antenna of the receiver in front, someone in the back, someone leads the wires through the flight controller, someone says that it is better to solder them in a cascade, someone places the transmitter inside the drone, someone on the side.
It is very difficult to independently check which version of the assembly is better without professional education and experience. Here, you have to rely completely on the instructor's competence.
Step 2. Drone assembly
Then, the assembly of the drone actually begins. Subjectively, this stage is the easiest. This is just the part of the job that anyone can do.
For an experienced engineer, this process takes up to 2 hours.
The key skill required for this is the ability to solder.
If you already have this skill, you can safely skip this text block. If not, it will be useful.
The drone has about 25 solderings, and (again, subjectively) it is not easy. Did not do it enough? The wire breaks off. Used the soldering iron for too long? You can burn the board. Went overboard with the materials? It is ruined.
In our course, one of the students damaged the flight controller board and had to buy a new one. This is one of the most expensive parts of the drone.
One of the advantages of the offline course I took is that they teach soldering. Other courses I saw were shorter and cheaper, but according to the reviews, you had to come there already with soldering skills. Under such conditions, you can really learn to assemble a drone in one weekend.
I will say frankly: it is not very easy to learn to solder from scratch. Therefore, I would advise you to go to courses on assembling drones already after a little training in soldering:
- First of all, I would advise you to watch a video about what soldering is and what it takes.
- Before learning how to assemble drones, it is worth practicing a little with soldering. As an option, assemble a radio from such a set. You can watch a video with instructions here.
If you succeed, you can safely move on to learning how to assemble a drone. If it didn't work out, it's okay because, again, subjectively, it was much easier to solder the drone than this radio.
The second option is to buy a breadboard and small wires and practice. At the same time, hone the skill of removing the insulation from the wires because, at first, it also takes a lot of time.
Step 3. Programming
After the drone is assembled and tested, the third stage begins — programming.
You need to download software to the drone, which you need to take somewhere beforehand. Again, searching for something on your own without experience and skills is highly, highly discouraged.
The advantage of comprehensive courses is that they provide their software, which only needs to be downloaded to the drone through the Betaflight program. There are also nuances here, without knowing which, you can a) burn the drone, b) break the parts.
Step 4. Testing the drone
The next step is to check if the drone is flying. For this, you need flight equipment: a remote control (about ₴6,000 + 2 transmitters for the most common systems at ₴2-3,000 each) and a battery (here the prices are very different). For basic testing, a small room like a student auditorium is sufficient. But on the good side, each drone must be checked for flight range, and for this, you need access to a training ground.
General recommendations
- If you have the time and money, I would highly recommend taking an offline drone assembly training course. This is a necessary skill on par with the ability to provide first aid. Even if you don't assemble them, you'll at least understand which drones are good and which ones aren't, and you'll be able to spend more effectively on military support. Moreover, the money spent on such training is still an investment in developing organizations that supply drones for the defense forces.
- If you only have the time, at least take the online training from Victory Drones, linked above.
- If you are an entrepreneur and have the resources, I highly recommend starting a small drone assembly shop. In the coming years, the demand for them will be crazy, and there is a great shortage of workers. It is only necessary to find an umbrella partner who will undertake the purchase of equipment, the selection of schemes, and the development of software.
- If you're a techie who somehow managed to read this part of the post, I'd advise you to seriously consider retraining as a drone assembly engineer. Again, they are in great need right now.


